Docker is an application hosting framework. It enables you to wrap virtual-machine containers around your applications and both manufacture and control them via API.
Docker allows you to bundle your dependencies/servers and your application into a thin image that is layered on top of another one (such as Ubuntu, or something more formally prepared for your needs). These are different than virtual machines, in that even though they are heavily isolated from the other processes in the system using LXC and cgroups (Linux concepts talked about in previous articles), they share the same resources and have almost no overhead. When you start a VM, you end up at a prompt or UI that is ready for you to install and start applications. When you start an application container, you run a script that starts your applications and dependencies, and nothing else. You can run a handful of VMs on a system, but a thousand application containers. If you want to streamline distribution, you can then consider using CoreOS to host your images at the OS-level.
Another feature that Docker contributes to containers is version control. You can commit any change that you’ve made to your container as a new image. You can obviously also start as many containers as you’d like from the same image (images themselves are immutable).
Your own process for distributing images to other teams or other companies might require a place to publish or coordinate your images beyond your current system. This is done via a Registry. Though Docker provides the public Docker Hub Registry, you may want a private Registry of your own for your company or development team.
Because the components/accessories of Docker are, themselves, often distributed as Docker images, this example has the second effect of showing you how easy it is to start a Docker-based application (in case you were unfamiliar, before). You don’t need to know anything about the guest application other than what ports its services are hosted on. In fact, you can start Docker images (which are then referred to as containers) that may be required for other Docker images, have Docker map random local ports to them, and then automatically forward ports from the containers that provide a service to the containers that depend on them (via a feature called linking).
Start your Registry using something similar to the example from the Registry project homepage:
$ docker run
         -e SETTINGS_FLAVOR=s3
         -e AWS_BUCKET=mybucket
         -e STORAGE_PATH=/registry
         -e AWS_KEY=myawskey
         -e AWS_SECRET=myawssecret
         -e SEARCH_BACKEND=sqlalchemy
         -p 5000:5000
         registry
This essentially sets six environment variables for the application that tell it to store into S3 and forward port 5000 from the host (local) system to port 5000 in the guest (Registry). “registry” is the name of the image to run (if it’s owned by a particular user, it’ll look like “/”). If it’s not already available locally, it’ll be located and pulled. If not further qualified with a registry prefix, it’ll assume that it must be located at the Docker Hub.
An example session where we pull the Ubuntu image down from the Hub, and push it into our Registry. Notice that we qualify the “push to” and “pull from” requests on our registry by prefixing the hostname/port of our Registry:
$ sudo docker pull ubuntu:14.04
$ sudo docker tag 826544226fdc yourregistry.net:5000/ubuntu
$ sudo docker push yourregistry.net:5000/ubuntu
$ sudo docker pull yourregistry.net:5000/ubuntu
The tag command reserves a new spot in our registry for the given image from somewhere else. You’d get that ID string from the local listing.
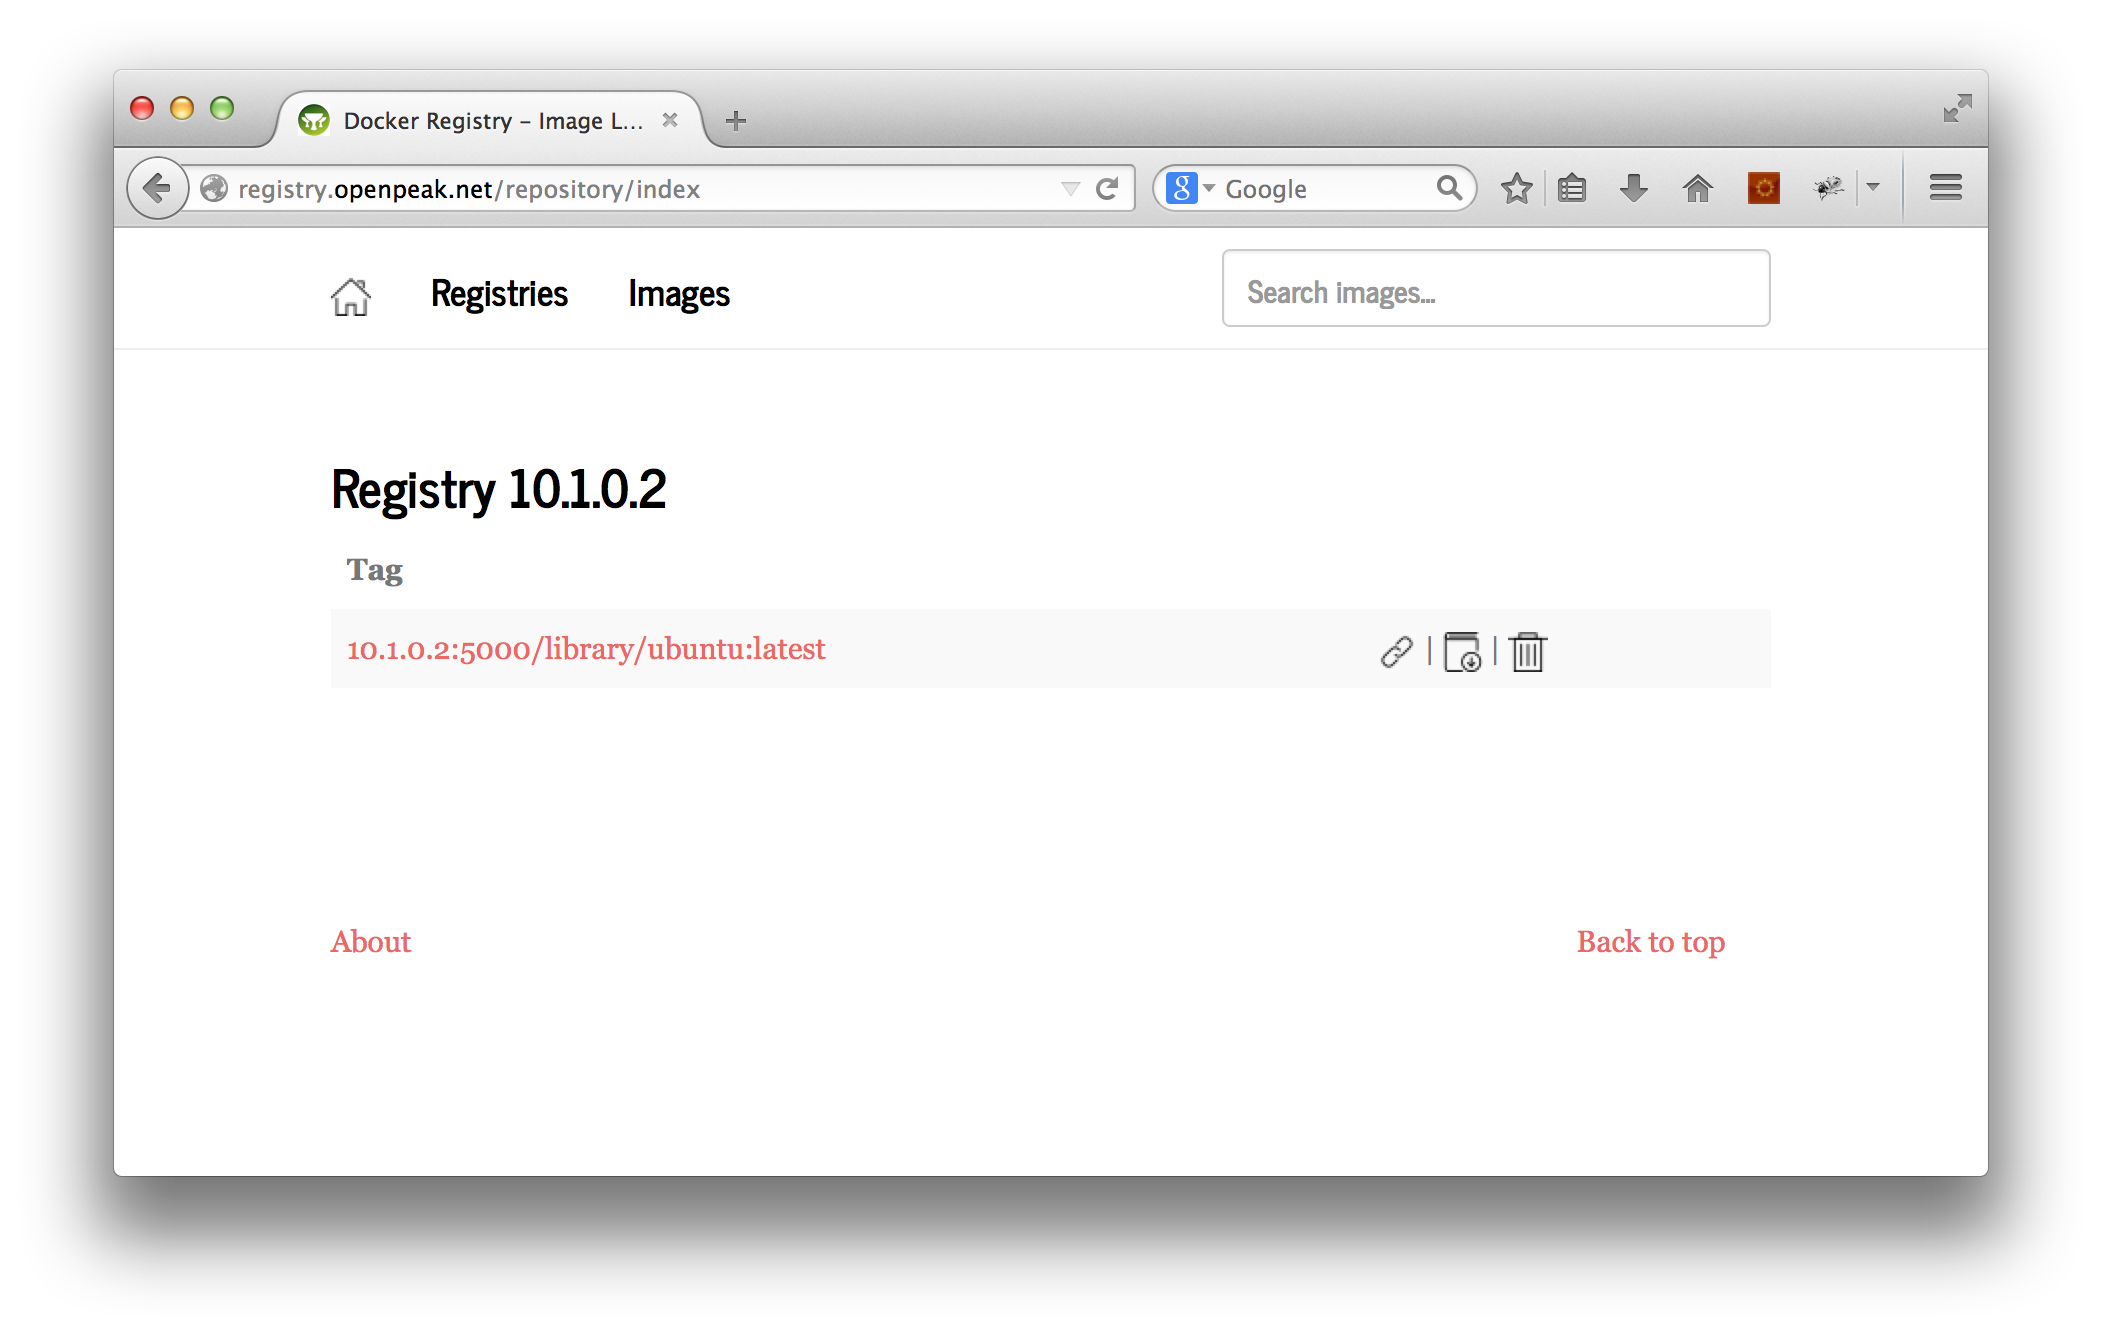
By default, the Registry communicates only directly to the Docker socket or can be managed via REST. If you want to have an easier time of browsing your images, install the docker-registry-web project:
$ docker run -p 8080:8080 -e REG1=http://<system hostname>:5000/v1/ atcol/docker-registry-ui
Keep in mind that it’s going to need to be able to talk to your Registry instance, so make sure the hostname that you’re giving it for the registry is resolvable from within the docker-registry-web container.
A screenshot:

docker-registry-web is actually a Java application, but, again, it would be a poorly designed image if it was important for you to know that.
Lastly, when you’re done playing-around with your Registry instance, make sure to hide it behind an Nginx-proxy, and add authentication (mutual, HTTP, etc..).


You must be logged in to post a comment.